Documentation
If you are a programmer, you can make your own custom cases and algorithms to use here! Check out the documentation page and look around if you ever need clarification.
Usage Guide
You might be wondering how exactly this tool works. Well, it differs slightly from problem to problem, but here is the gist!

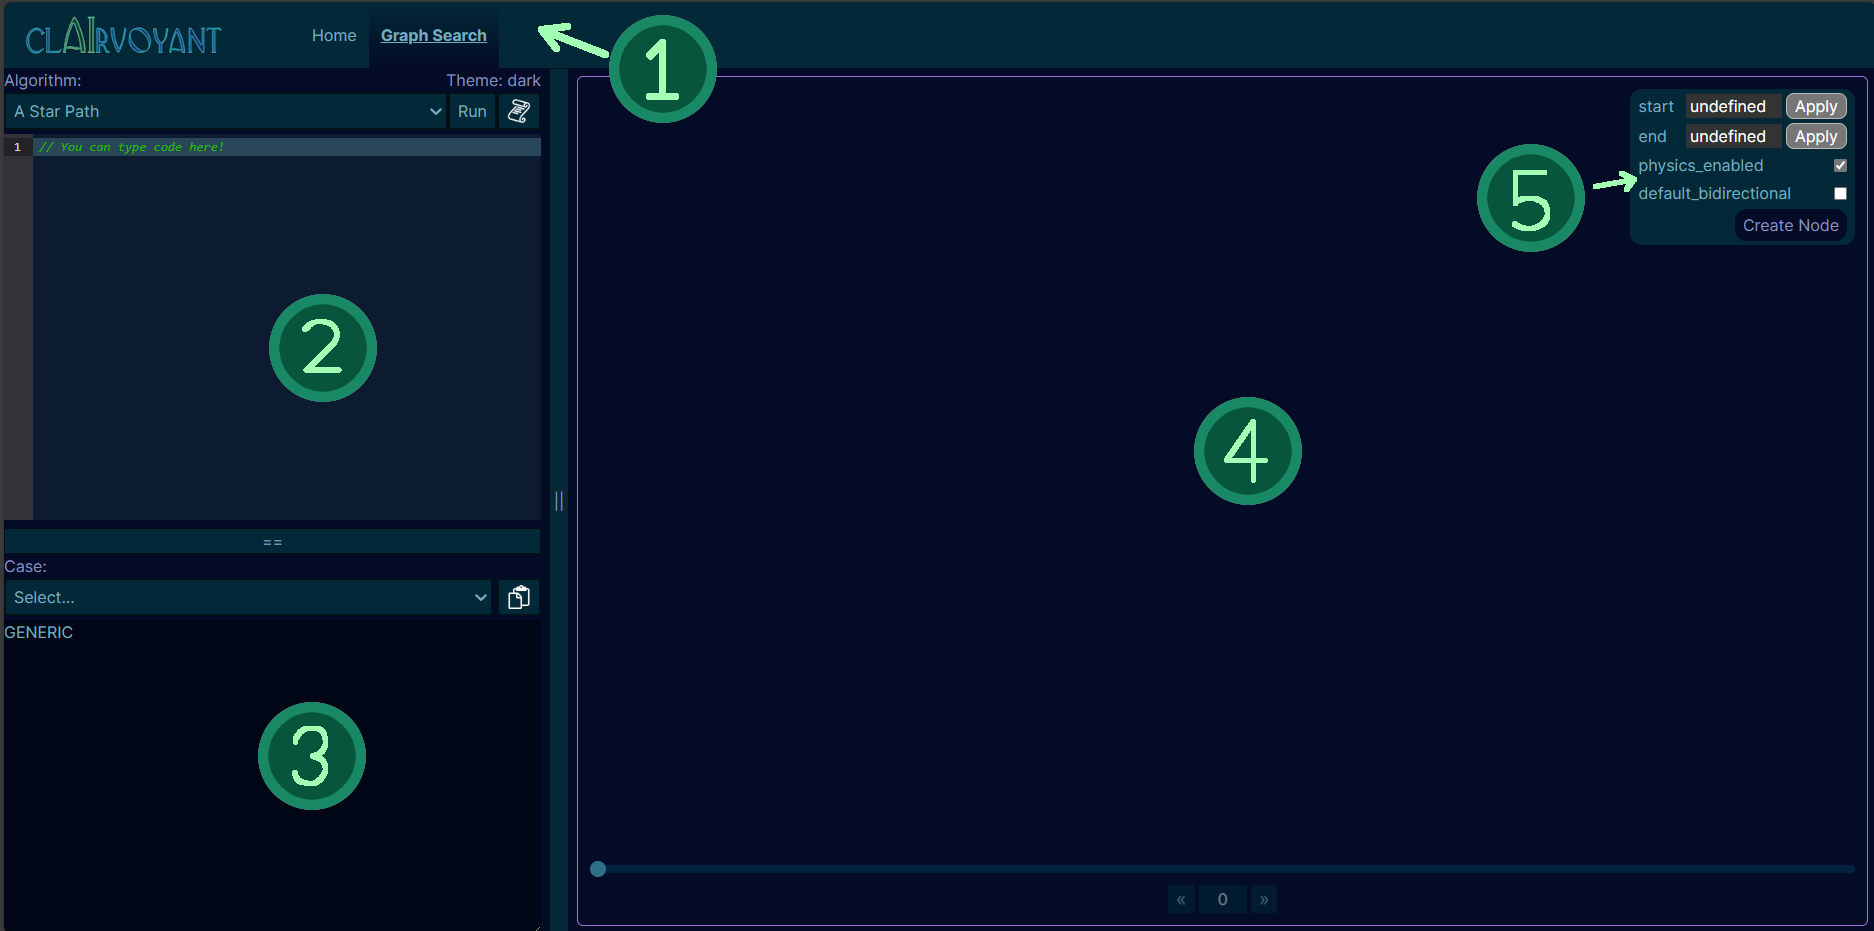
First and foremost, you can see the header at the top (1), this is where you can access the main pages for all problems. This is common among all pages in Clairvoyant.
What lies below is the problem window, composed of the algorithm editor (2), the case editor (3), and the solution viewport (4). We will dive deeper into those components in the following sections. But here is the basic idea: your algorithm (typically in JavaScript) will go into the algorithm editor, the case editor allows you to control the input to your algorithm; for example, for the graph search problem, the case editor controls the graph. Lastly, the solution viewport will visually display the case, with some data provided by your algorithm once you run it. Some problems allow you to visually edit the case in the solution viewport.
Additionally, each of this components is resizable! You can drag the dividers between the components to resize them to your liking.
Algorithm Editor (2)
The algorithm editor is where you will be able to write code to tell the program exactly how the case is supposed to be solved. Once you are happy with your solution, click the Run button above to execute your algorithm on the active case. Be careful with loops! long-running code can cause the application to hang. If this happens, you will likely have to forcefully reload the application.
You don't have to write the code just to see how it works, problems come with default algorithms and cases for you to play around with and see how they work. You can select these from the dropdown menu above the editor. That said, you are heavily encouranged to try and write your own algorithms to solve the problems. If you are confused about how certain functions work, documentation is available by clicking on the Docs button above the editor (labelled with a scroll).
Case Editor (3)
The case editor is where you will control the input to your algorithm. For example, in the graph search problem, you can control the graph in the case editor.
Much like with the algorithm editor, you can pick from one of many default cases provided to you for each problem. The way in which cases are expressed depends heavily on the problem. But you should be able to get a general sense of how it works form the examples, most of the time; you should be able to either use the default cases relatively easily or modify the case using the solution viewport.
Additionally, for convenience, if you would like to export the case, you can press the Copy to Clipboard button on the top right of the editor and save it locally.
Solution Viewport (4)
The solution viewport is where you will see the output of your algorithm. Typically, you will be able to see a visual representation of the case, along with some extra controls to visualize your solution or play around with the problem. You may also spot property inspectors (5) around the viewport, these are helpful, generic ways to inspect the properties of certain components of the case and potentially alter them.

